Domain Name Service, or DNS, is at the core of the internet. You can access any website without entering an IP address thanks to DNS. Without DNS, you would need to memorise an address like 142.251.16.100 in place of just typing google.com into the address bar of your browser. In other words, DNS facilitates user-friendliness on the internet. The effective operation of your PC, laptop, tablet, and even phone depends on DNS.
Almost all of your actions on linked devices start with a DNS query. Consequently, DNS is active whether you use almost any app on your mobile device or search in the address bar of your web browser.
The issue is that traditional DNS isn’t secure, so all of your network communications are relayed in plain text.
Why is that an issue?
Let’s imagine you begin your Android device’s search for various items while connected to a public network (like one at a coffee shop). Another scenario is when you need to access a CMS or other professional tool but don’t want the public to see the address you’re inputting. The URLs you visit or the search terms you enter could be intercepted by someone else on the same network if they have the necessary skills. That might not be hazardous or it might be dangerous. In either case, why run the risk?
In this situation, Private DNS Mode is useful. Once you turn on this feature, all of your DNS requests are encrypted, making them impossible for malicious parties to access (even if they manage to collect those packets). In other words, if you value your security and privacy, Private DNS Mode should be a must-have. But how can you activate Android’s Private DNS Mode? Actually, it’s quite easy. Let me demonstrate.
How to enable Private DNS mode on Android
What you’ll Need: An Android device running at least Version 9 of the operating system (which was launched in 2018) is all that is required to activate Private DNS Mode. Therefore, almost every Android phone in use today is able to enable the feature.
1. Open Network & internet
Tap Network & internet after launching the Settings app (either the Notification Shade or the App Drawer).
2. Enable Private DNS
The Private DNS item is located near the window’s bottom under Network & Internet. Go back to the main Settings page and search for Private DNS if you can’t find it there.
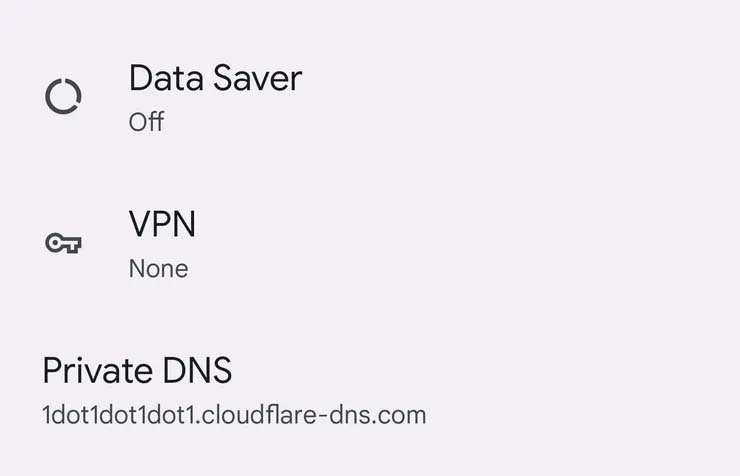
Image: Jack Wallen/ZDNET
3. Add a provider that offers secure DNS
It can be a little tricky here. You must know the location of a company that offers private DNS. Here is my preferred supplier:
1dot1dot1dot1dot1.cloudflare-dns.com
Other potential hostnames you could choose are:
- Google DNS: dns.google
- Quad9: dns.quad9.net
- Cleanbrowsing DNS: security-filter-dns.cleanbrowsing.org
- Open DNS: 208.67.222.222
- NextDNS: 45.90.28.0
- Comodo Secure 8.26.56.26
- OpenNIC: 192.95.54.3
Note: Although all of the aforementioned free DNS providers are worthwhile of a try, Cloudflare (1dot1dot1dot1.cloudflare-dns.com) is the one I would suggest. It’s the quickest and safest of the bunch in my opinion. DNS filtering, which Cloudflare adds to the mix in addition to speed, can assist stop email from being sent from dangerous IP addresses.
A new pop-up will show up when you tap Private DNS. Choose your preferred DNS provider’s hostname by tapping Private DNS Provider Hostname, and then input it.
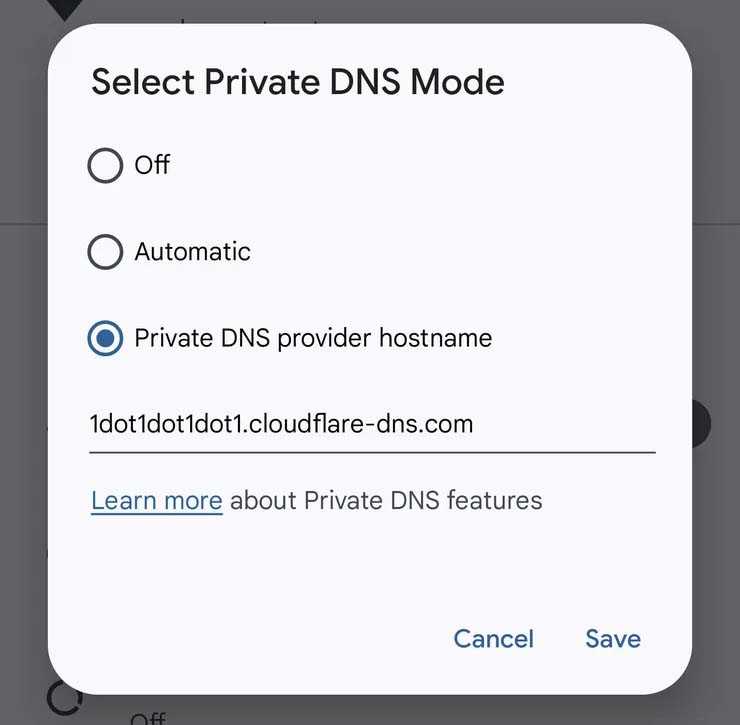
Another option is Automatic, which will switch to Google’s Private DNS whenever it becomes available. For those who are hesitant to trust Google with such a function, I suggest selecting Private DNS and then entering the provider’s address. To save the updated setting and quit the Settings app, tap Save.
There are no other details to add. All of your DNS requests will be encrypted once you’ve enabled Private DNS on Android. Enjoy the enhanced security and privacy.
Humbly Request To All Visitors!
If you found above both downloading link expired or broken then please must inform admin by fill this Contact Us! Form