Learning how to create a YouTube channel can be much more difficult than getting started with other social networks. But that doesn’t have to be the case. Also, YouTube is the most popular social platform for American adults. Nearly three-quarters of American users use the social video site, compared to 69 to 69.
More than half of these users visit YouTube every day. In fact, YouTube is the second most visited website in the world behind Google – the parent company of YouTube. With such a large reach, YouTube is an opportunity your business cannot afford to ignore.
How To Create A YouTube Channel In 10 Easy Steps
Step 1: Create a Google account
If you’ve ever signed in to Gmail, Google Maps, Google Play, or any other Google service, you already have a Google Account. In that case, you can move on to the next step. Don’t worry about whether the name and email address associated with your existing Google Account is appropriate for your brand. Your existing Google Account details will not be publicly linked to your YouTube account. The account is the only key to your door.
If you don’t have a Google Account yet, here’s how to get one.
1. Go to the Google account creation page. You can choose to create a new Gmail address for your account, or use an existing email address.
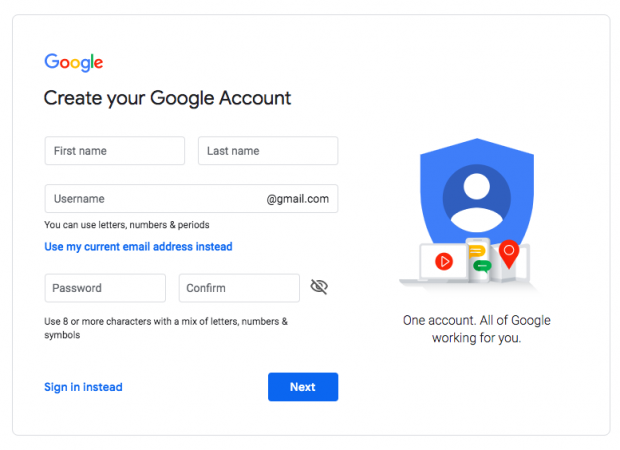
2. Enter the details, and then click Next.
Step 2: Create a Brand Account For YouTube
Your Google Account will automatically give you a private account on YouTube. However you want to set up a brand account to create a YouTube account for your business. With a personal YouTube account, you can manage a single channel. Your channel will have the same name as your Google Account, meaning you can’t use your brand name. This is not ideal. You will customize your channel for your brand when you create a YouTube Brand Account, and offer access to team members. Here’s how to go about it.
1. Sign in to YouTube using info about your Google Account.
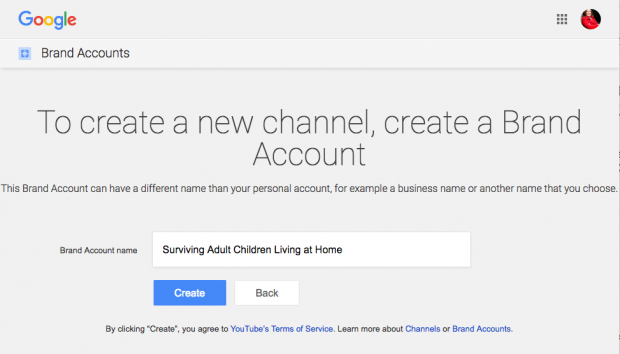
2. Go to your channel page on YouTube. If you have never created a channel on YouTube before, you will only see your personal account. If you already have an existing channel of the brand, you will see that too. Click the Create a new channel to create a brand new channel.

3. Enter your name, then click Create.
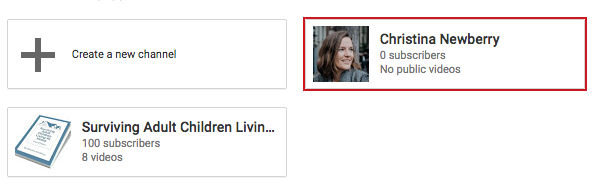
Now you’ll see both your personal account and your company account if you go back to your channels tab.
Your brand account gives you access to YouTube analytics and gives you great insights into who’s watching your videos and what kind of content they ‘re reacting to best. Learn more on how to Market YouTube in our post.
Step 3: Add your brand identity
As with any social platform, it is important to show a clear brand identity when you’re starting a YouTube channel.
Add Channel Artwork
1. Log in to a device using YouTube. You can edit only pictures of your channel from a screen, not from a mobile device.
2. Tap the profile icon at the top right of the screen and pick Your channel.
3. To bring up the Edit channel icon feature, hover over the profile image. Upload a image, and change the crop. For your channel icon your business logo is a good choice. The recommended dimensions of the image are 800 x 800 pixels. It is going to make youTube at 98 x 98 pixels.
4. To bring up the Edit channel art function, swipe over the banner image. The recommended size for an image is 2,560 x 1,440 pixels. You can preview how different devices will look at your cover art, and adjust the cropping accordingly.
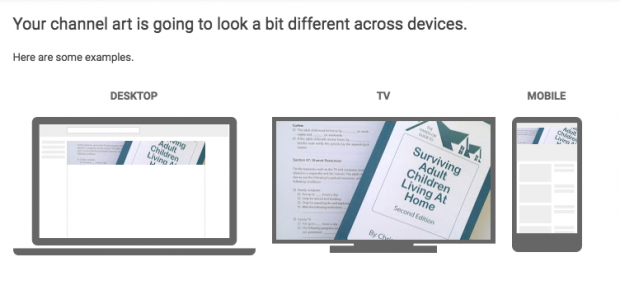
Use the YouTube template to ensure you ‘re designing a cover image that works on all screens.
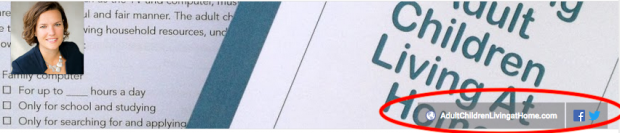
Add Links To Your YouTube Channel Banner
1. Log on to a computer in YouTube, go to your channel and press Channel Customization.
2. Click the tab About, and scroll down to Links.
3. To add ties that will appear over your channel banner art, click the pencil icon.
4. Type in detail about your website. You can pick how many connections you want to include. If you add links to social channels, the social media icons will indicate them.
Step 4: Upload Your First Video
Congratulations, You’ve created a YouTube channel now. It is time to begin adding content of some quality.
1. Sign in to your account on YouTube.
2. At the top of your screen click on the Make a Video or Upload button. It looks like a video camera.

3. Click Upload video.
4. Pick the video from your machine you want to upload.
5. While uploading your video, add up to 100 characters in a title and up to 5,000 characters in a description. Be sure to include appropriate keywords in your explanation of your video, but avoid keyword-stuffing.
6. Select publish.
Not sure what to add to your YouTube videos? Check out our YouTube marketing guide for tons of great ideas on creating content.
Step 5: Create a YouTube channel structure
Once you have posted a few videos, it is crucial that you start organizing your site. You don’t really want all of your videos to be lumped together, or always turn up first with the most recent ones. Think about how you want people to work through your YouTube channel, and accordingly build your YouTube account structure.
For example, you’ll see categories for Hootsuite training , customer stories, product information , and information about social media marketing on the Hootsuite YouTube page. Dividing our videos into these categories makes it much easier for the site to navigate and for the content to be used.
You can always change the structure of your channel later, but when you start a YouTube channel first, it is a good idea to build the basic framework. You may have as many as 10 sections per channel.
The first move is to get the content organized into playlists. Then each playlist could become a section of its own.
1. Sign into YouTube, go to channel, and click Channel customization.
2. Click the tab for Playlists.
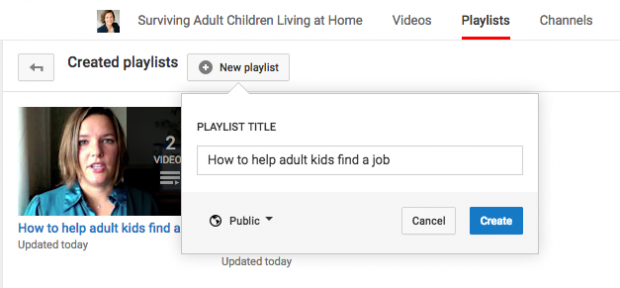
3. Click New Playlist button.
4. Insert a playlist title. It can last as long as 150 characters. Click Build button.
5. Your new playlist will take you to a screen. Click Alter button.
6. Tap the Add Videos button.
7. Click Your videos on YouTube.
8. Pick the videos that you want to add to your playlist and select Add Videos.
Don’t just build playlists by chance. Each playlist should have a clear focus and progress logically to keep people watching from one video to the next. We’ve got some great tips on how to get more subscribers on YouTube to create meaningful playlists in out post.
You can then use your playlists to create sections on YouTube’s channels:
1. On a computer, sign in to YouTube, go to your channel, and click Channel customisation.
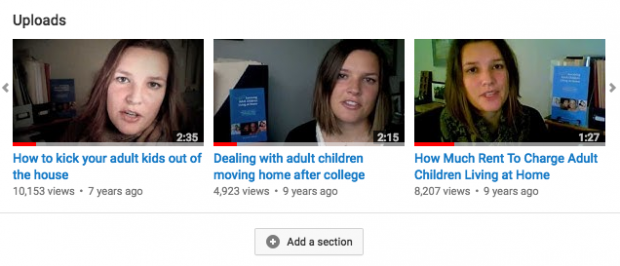
2. Scroll down to screen bottom, and click Add a section.
3. Choose Single Playlist from the drop-down menu on Content.
4. Pick My Playlists, under “Select a Playlist.”
5. Choose the playlist you want to turn into your own segment from the dropdown menu “Select Playlist.”

6. Click Done.
Step 6: Create a Channel Trailer
A channel trailer is a short video that lets you introduce yourself to new channel guests. Use it to show new audiences what you are all about, and why they should watch your videos and sign up for your channel. This SaraBethYoga channel trailer video does a great job of explaining what viewers on her channel will find, and why they should stick around to explore what she has to offer.
Here’s how to make your own trailer to a YouTube channel.
1. Log in to YouTube, and upload your channel trailer video.
2. Go to your channel, and click Channel Personalization.
3. Tap New Visitors tab, then tap Trailer Stream.
4. Choose the video you want to use as your trailer then click Save.
Step 7: Make Your Channel Discoverable
Now that you have your channel set up and some great content ready to go, it’s time to make sure your channel can be found by people. Here are a few ways you can discover your channel.
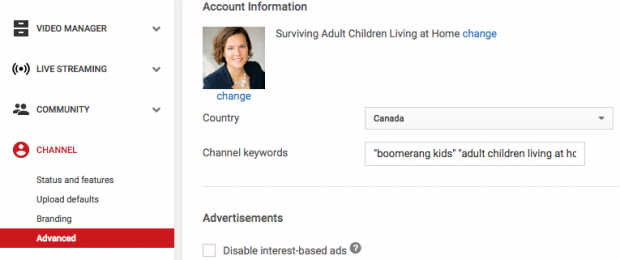
Add Channel Keywords
1. Sign into YouTube and right top right click on your profile icon.
2. Then choose Creator Studio from the drop-down menu.
3. Click Channel in left menu. Then click Advanced in the menu that appears underneath.
4. Enter keywords appropriate for your content in the “Domain Keywords” section. Be sure to concentrate only on keywords that are directly relevant to the content you plan to develop.
Allow channel recommendation
1. Scroll down to the recommendations section of the Page, and click on the option to allow your page to appear in recommendations from other channels.
2. Scroll down and click Save.
Add a great channel description
1. Click Customize Channel on your YouTube channel page.
2. Click the Add tab.
3. To add a channel summary, swipe over the summary field and click on the pencil icon. You have up to 1,000 characters, so make wise use of them. To help make your channel more discoverable, provide the necessary keywords.
In our post you can find specific tips for the YouTube SEO on how to promote your YouTube channel. We also have more channel promotion strategies in our post about how to get more views on YouTube.
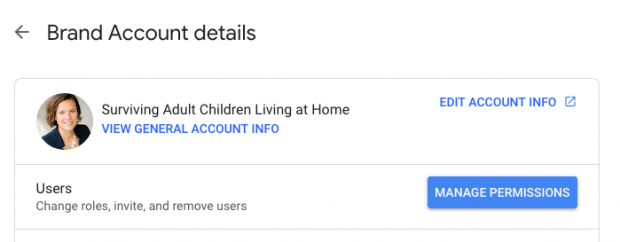
Step 8: Add Team Members
Your Channel on YouTube is in great shape. Now it’s time to add members of the team to help manage that.
1. Sign into YouTube and click the icon on the top right of your profile
2. Choose Settings in the dropdown menu.
3. Click the Add or Remove Managers at the bottom of the page.
4. Click Manage Allowances.
5. To invite new users, click the People icon in the top right corner.
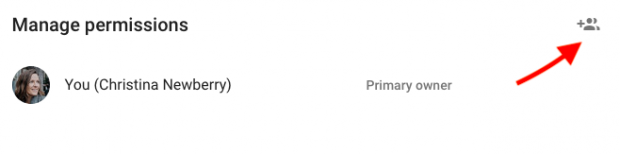
6. Enter the email addresses of the members of the team you want to connect to your account. You need to pick a role for each person. Owners can take some step, including deleting the account and adding new accounts on that account. Videos may be posted to managers. Communications manager is not a necessary role for YouTube, as your channel is not accessible via this function.
7. Click Invite button and then Done.
Step 9: Verify Your Account to Access More Features
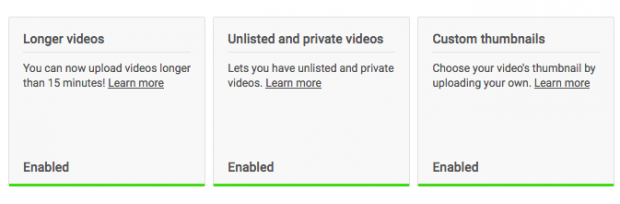
To upload videos longer than 15 minutes and create custom thumbnails for your videos you must check your YouTube account.
1. Head to youtube.com/verify
2. Choose your country, then choose whether to obtain your verification code by text or via an automated voice message.
3. Please enter your phone number.
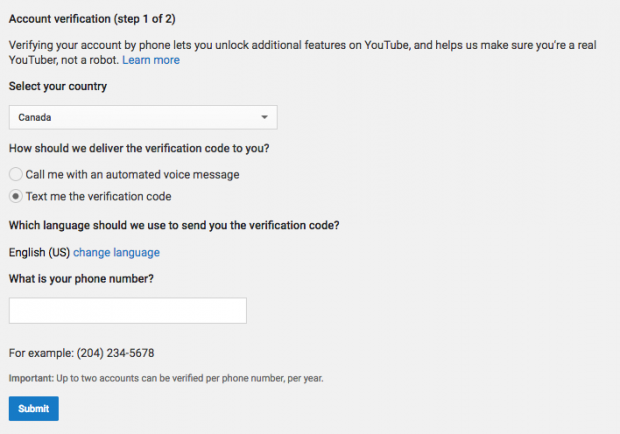
4. Enter the code you receive for verification, and click Submit.
5. Select Next.
Your channel is currently being confirmed. You will notice that on your channel now the options for uploading longer videos and creating custom thumbnails are enabled.
Step 10: Join the Partner Program at YouTube To Unlock More Features
You will apply to join the YouTube Partner Program after you hit more than 1,000 subscribers and get over 4,000 public watch hours in the last 12 months. Joining the program unlocks many more features, including monetization tools, for your YouTube channel.
1. Sign into YouTube and right top right click on your profile icon.
2. Then choose Creator Studio from the drop-down menu.
3. Click Channel in left menu. Then press Status and Features in the menu that appears below.
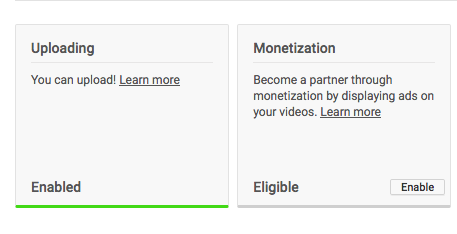
4. Search the Monetization box, and click Activate.
5. Follow the steps that lead you through the monetization application, begin by reading and agreeing to the terms of the YouTube Partner Programme.
6. Wait …… wait. Applications for the YouTube Partner Program currently take over a month to be reviewed. To boost your chances of being accepted, make sure you completely comply with all the terms and conditions before submitting your application.
Starting a YouTube channel might sound overwhelming, but remember that just starting to create great content is the most important thing. As you grow, you can finesse the details of your YouTube channel.
With Hootsuite, you can easily upload, schedule and promote your YouTube channel and videos from a single dashboard over multiple social networks. Give it a free try today.